

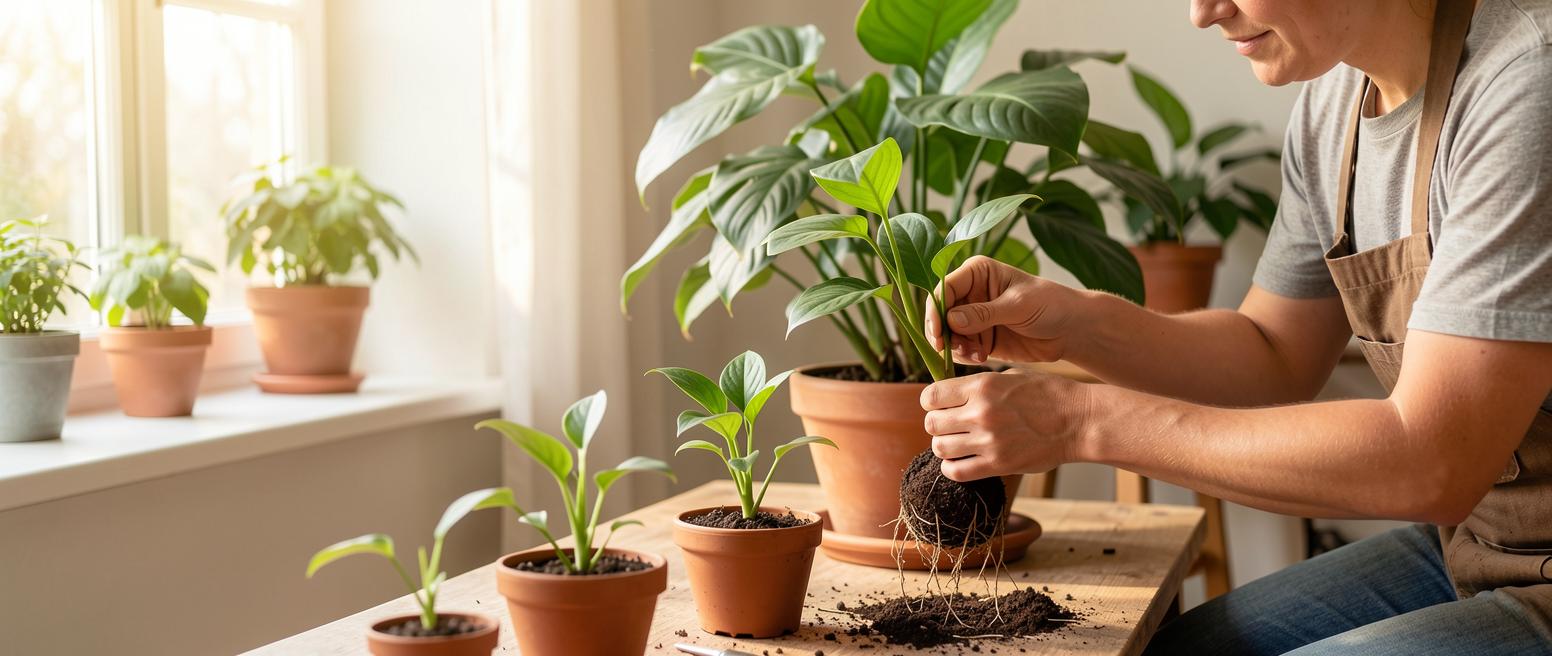
Almost every plant can reproduce itself; otherwise, the species would not exist. The art of taking cuttings is nothing more than assisting that natural urge at the right moment.
Cuttings in brief
Plants can be propagated by seed or by cuttings. Not every species is equally suited, but the number of plants you can double with a knife and a pot of soil is greater than most people think. This guide outlines the techniques, including the best time, approach, and pitfalls for each method.
Why cuttings work

When taking cuttings, you take a part of an existing plant, the mother plant, and separate it. This can be a tip, a piece of stem, or a leaf. Under the right conditions, that part will form roots and grow into an independent plant.
This works because the tissue just below a leaf axil is still capable of changing function. As soon as the shoot no longer has roots to rely on, that tissue switches to producing roots.
A cutting is therefore not a new individual in a genetic sense, but a clone of the mother plant. Everything you value in the mother plant, from leaf markings to flower color, will be precisely replicated in the cutting. This is the big advantage over growing from seed.
Tip cuttings
For a tip cutting, you take the top 10 to 20 centimeters of a shoot, including the growing point. Then, remove the leaves from the bottom up to about halfway. The cutting then needs to sustain fewer leaves and will put that energy into root formation.
- Choose a young shoot. A branch that is still in its growth phase roots better than a fully mature one.
- Make small incisions with a sharp knife along the bottom of the shoot. These small wounds stimulate the plant to produce roots.
- Insert the shoot into a small pot with slightly moist cutting soil and gently press the soil.
- Maintain a temperature of approximately 20 degrees and place the pot out of direct sunlight.
Work with a clean and sharp knife. A bruised cut is the first place where rot begins, and you'll only notice it when it's too late.
Allow approximately four weeks until the cutting has sufficient roots. A slight resistance when you gently pull on the cutting indicates that rooting has occurred.
Stem cuttings
A stem cutting works almost the same as a tip cutting, with one difference: it has no growing point. You take a section from the middle of a sturdy, well-developed shoot, about half a centimeter thick.
This is the most common method in the cutting trade, simply because you can get multiple cuttings from one long shoot instead of just one. Make sure you note which way is up: a stem cutting placed upside down in the soil will not root.
Ensure that each piece of stem has at least one leaf axil or eye below the soil. That's where the roots will form. A piece of stem without an eye will lie there indefinitely and eventually rot.
Leaf cuttings

Some plants can form an entirely new plant from a single leaf, or even part of a leaf. The roots then emerge from the leaf tissue itself. There are three variations you’ll encounter in practice.
Leaf of a young plant in soil
This method only applies to a handful of species. You take a leaf from a young plant and insert it upright into the soil. A new plantlet develops at the base, which eventually detaches from the mother leaf. From that moment on, it is an independent plant.
Leaf cutting with petiole
Here, you take an intact, mature leaf including a piece of petiole about two to three centimeters long. This petiole goes diagonally into the cutting soil, with the leaf just above it. The roots form at the end of the petiole, and then the new plantlet appears at the base.
Leaf cutting without petiole
For plants with long, sturdy leaves, you can cut the leaf into pieces of five to seven centimeters and place these pieces upright in the soil. Again, maintain the original growth direction. Each piece can yield its own plant, making this method surprisingly productive.
Soil, light, and warmth
A cutting has no roots and therefore cannot absorb anything. Everything revolves around an environment where it loses little and doesn't have to perform much.
- Cutting soil, not potting soil. Cutting soil is poor and airy. Nutrients are not yet needed and are more likely to cause rot.
- Slightly moist, never wet. The soil should feel cool, but no water should be able to be squeezed out of it.
- Around 20 degrees. Bottom heat noticeably accelerates rooting.
- Plenty of light, no direct sun. Bright sunlight causes the cutting to evaporate faster than it can absorb.
- High humidity. A clear dome or bag over the pot helps, provided you air it daily.
When to take cuttings
Autumn is the most favorable time for many woody plants. The sap flow is less strong then, meaning the cutting loses less moisture and has a better chance of survival. Softer houseplants, however, are best propagated during the growing season.
What to do when
Fresh growth, high rooting drive. Ideal for leaf and tip cuttings of soft plants.
Take shoots that are woody at the bottom but still flexible at the top. Watch out for dehydration.
Sap flow decreases, cuttings survive more easily. Preferred time for tip and stem cuttings.
Cuttings barely grow. Keep them cool and light, and water sparingly.
Repotting
Once the cutting has formed roots, usually after about four weeks, it can be transferred to regular potting soil. Choose a pot that is only slightly larger than the root ball; too much soil will stay wet for too long.
Afterward, give the young plant a few weeks of shelter before placing it in its permanent spot. Only after repotting should you start with light fertilization.

What can go wrong
Taking cuttings is inexpensive. Always take a few more than you need, so a failure isn't a problem but simply part of the method.
The cutting rots away
Almost always due to being too wet, too little air, or a bruised cut. Use airy cutting soil, don't press too hard, and air a covered pot daily.
No roots after six weeks
Usually due to a shoot that is too old or too woody, or too cold. Increase the temperature to around 20 degrees and try again with younger material from the growth phase.
Leaves wilt or fall off
The cutting evaporates more than it can handle. Remove some leaves, place it out of the sun, and increase humidity with a cover over the pot.
Are you unsure about your cutting?
Send us a photo of the cutting or the mother plant, and we'll take a look with you. Cutting soil, pots, and tools can be found in our webshop.
Ask your question
Share:
Information about pruning plants
Light requirements of plants